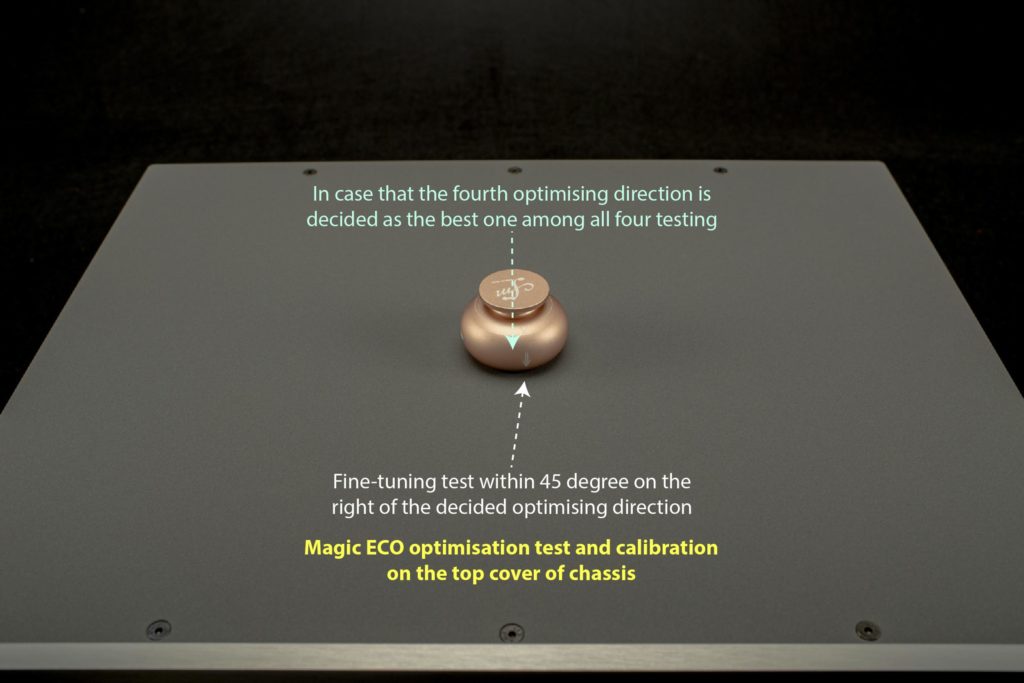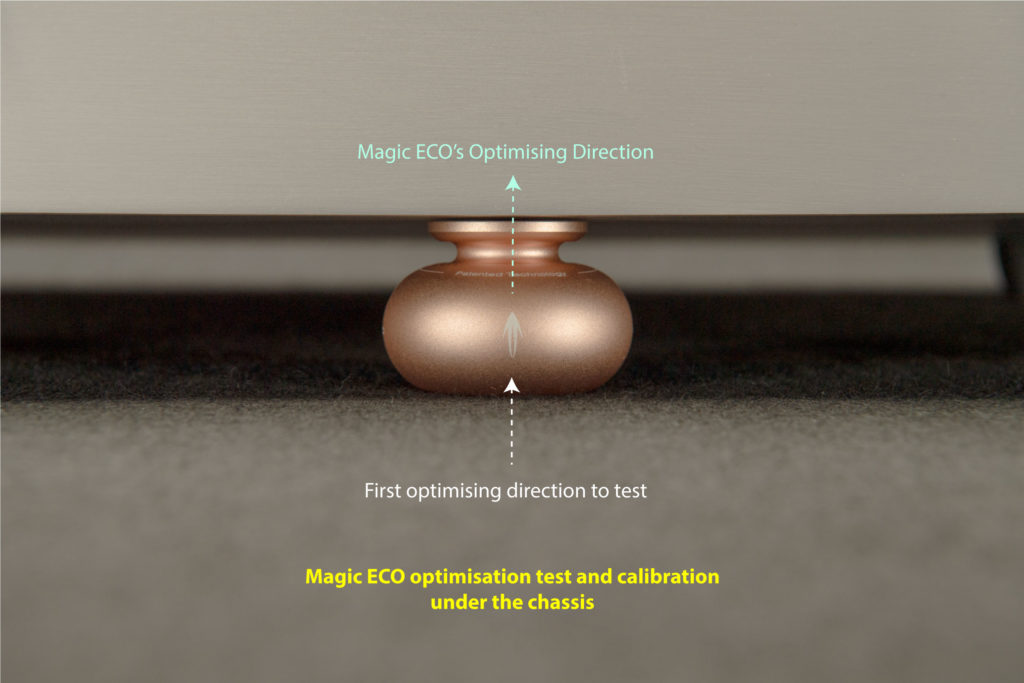
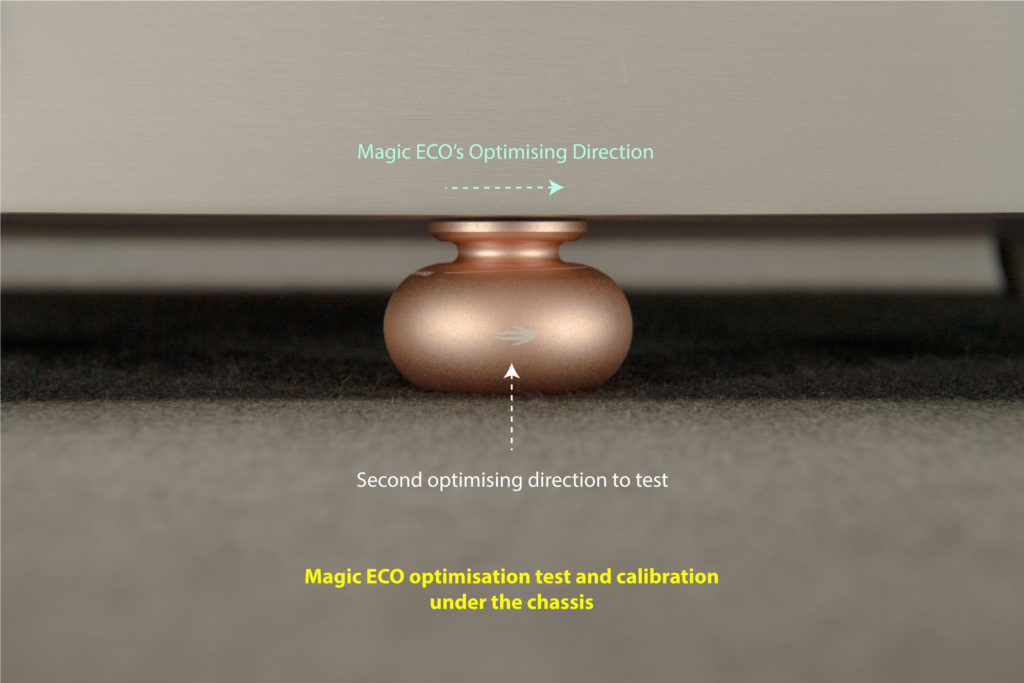
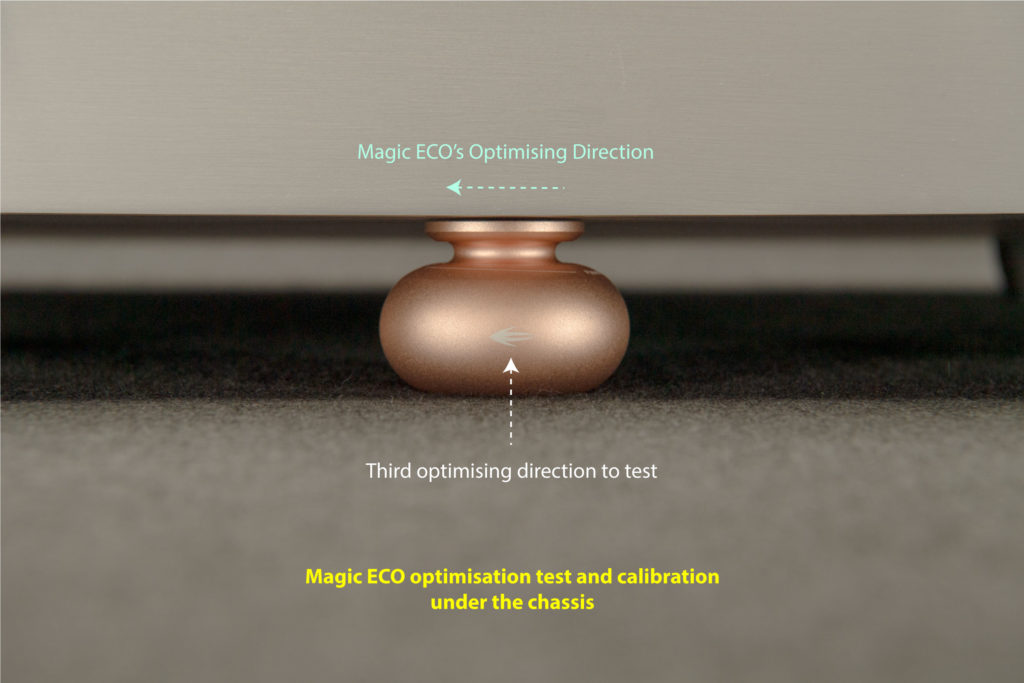
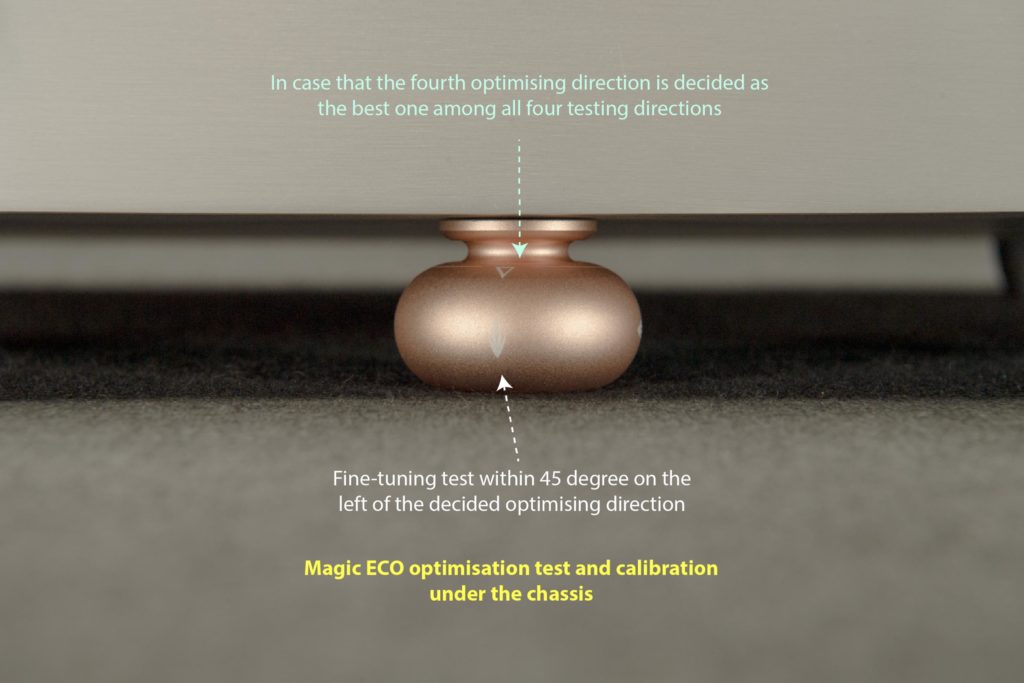
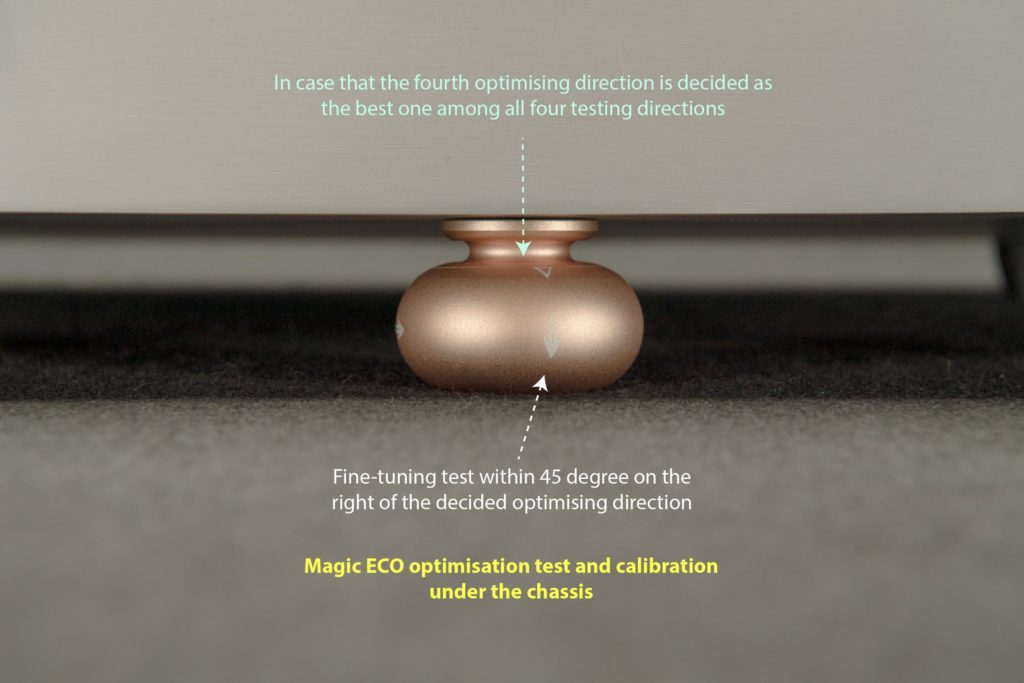
Alternatively, if you continue to adjust the Magic ECO gradually on the side where the sound quality is getting better, listening to how the sound increasingly improves, until you hear the quality just begin to deteriorate. Adjust it back very slightly, and this should be the ideal position for the best results.
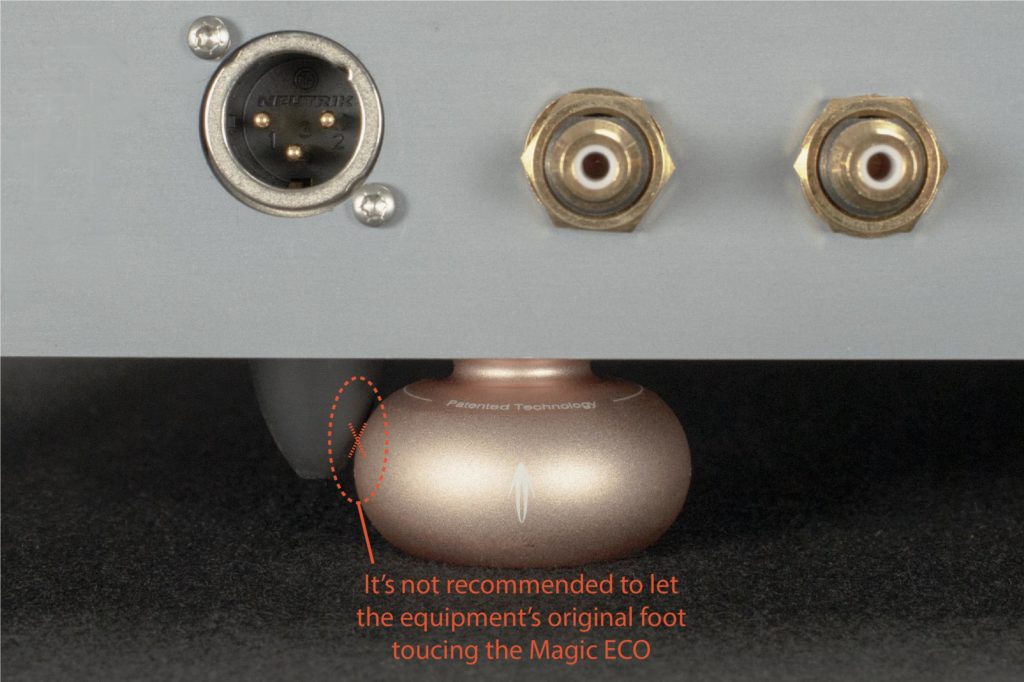
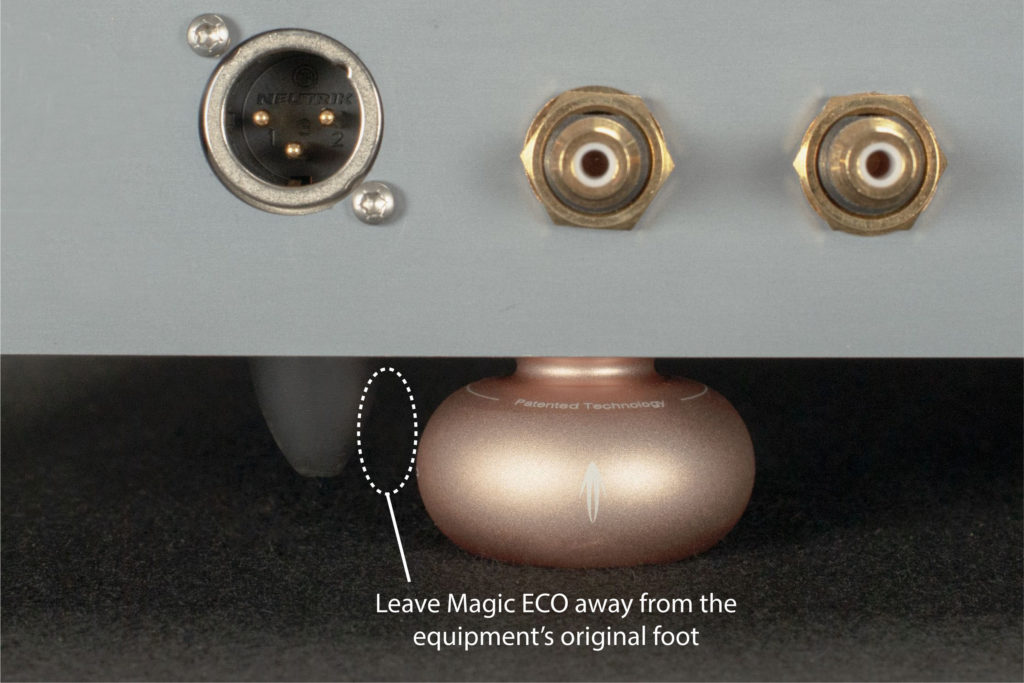
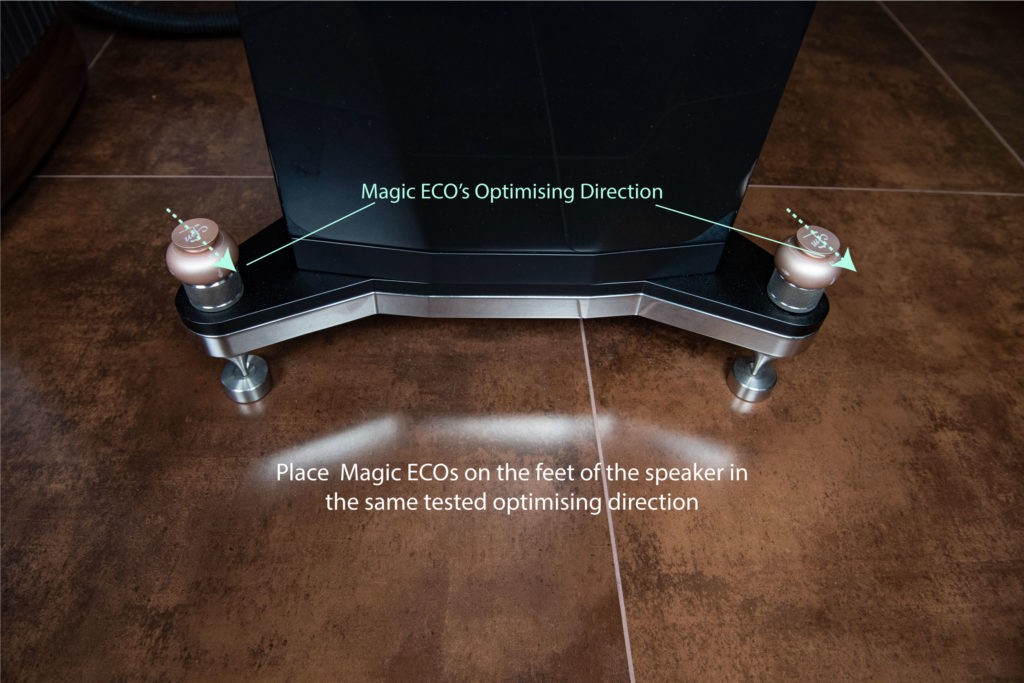
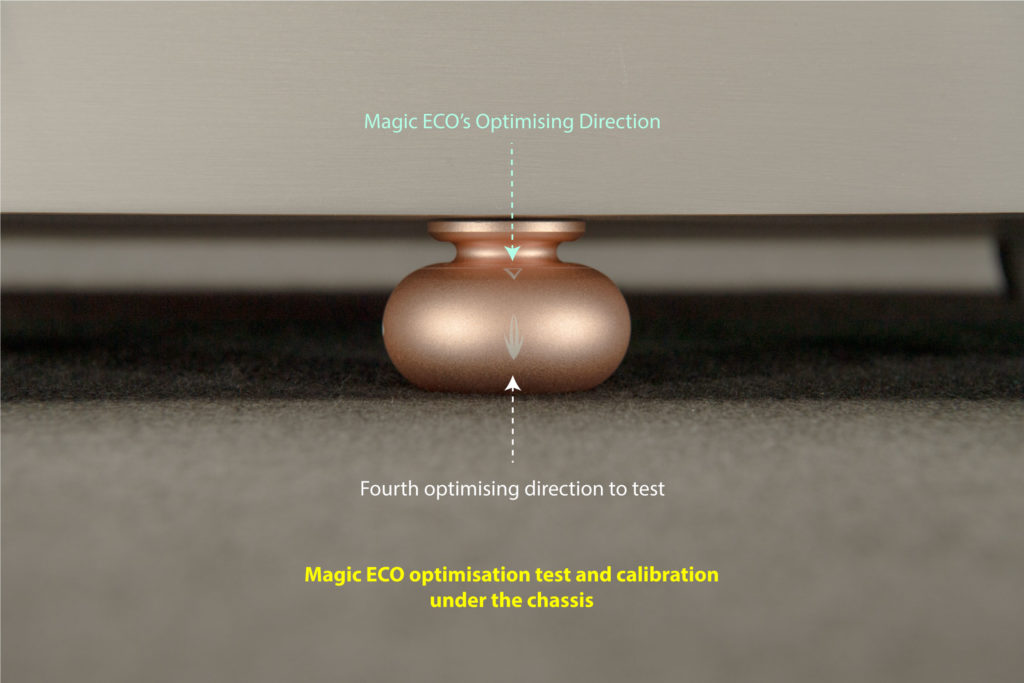
Placing Magic ECOs underneathe the equipment
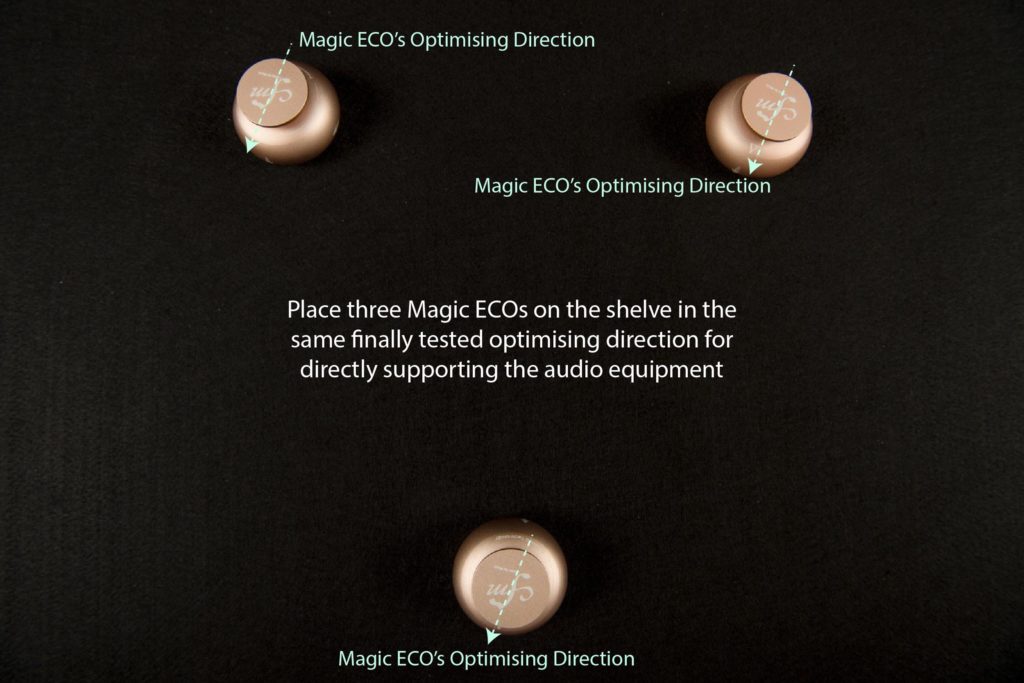
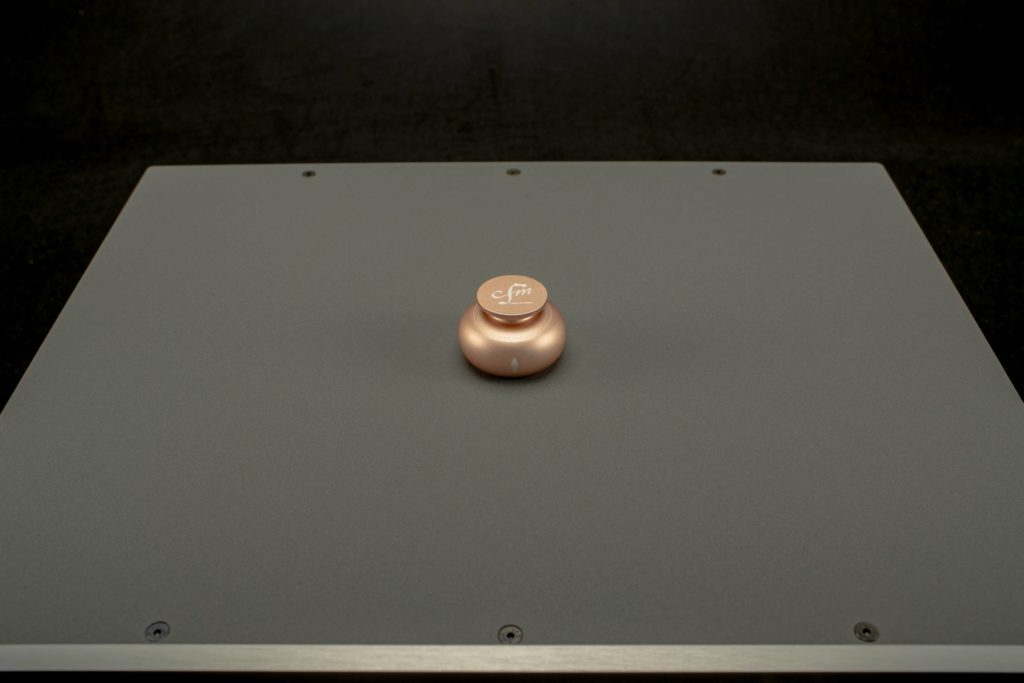
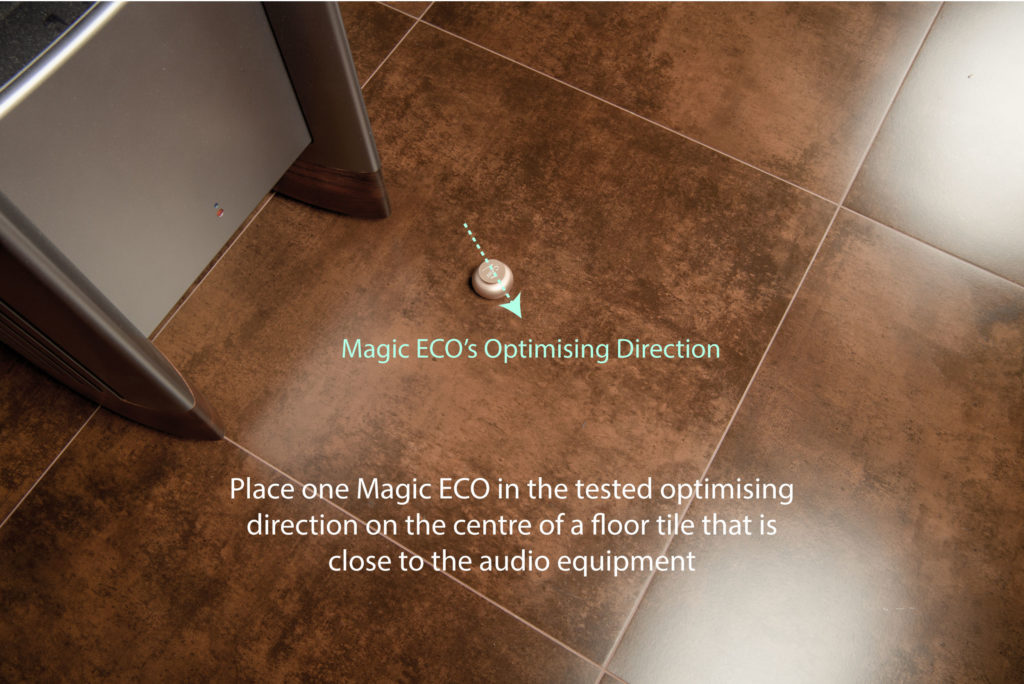
Completely remove your audio equipment from the shelf and place three pieces of Magic ECO on the surface in the optimising position you have decided on. The placement positions must fit the flat surface of the bottom of the equipment, avoiding any screws so as to avoid scratching and instability.